
Microcement Patch Repairs
We don’t recommend patch repairs generally, because it’s very difficult to do them seamlessly. Repairing, then recoating the entire surface is the only way to achieve a seamless repair.
Whilst we don’t recommend patching, and can almost guarantee it can’t be done seamlessly, we understand you may want to give it a go.
This guide explains the best approach for minimising visibility of patch repairs.
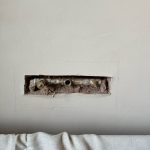
You’ve completed your microcement install, it’s looking fantastic & then your contractor comes along & puts a big hole in it – we’ve all been there at one time or another & it’s devastating, to say the least!
It’s very tempting to repair the microcement surface, then have a go at then patching in the microcement.
Notoriously Difficult to Patch
it’s very important to proceed with caution, generally, we would always recommend completing the repair, then recoating the entire surface up to the external edges of that surface e.g. the full wall up to the internal corners.
This is because microcement is notoriously difficult to patch. Even if you’re using the same product, out of the same tub, the trowel pressure & natural movement, that gives microcement it’s unique patina, can also make the patch stand out a mile against the original surface.
These guides explain more about repairing and recoating microcement surfaces:
Repairs to Microcement Surfaces
Recoating Microcement Surfaces
Proceed with Caution
Whilst we don’t recommend patching, and can almost guarantee it can’t be done seamlessly, we understand you may want to give it a go & want to give you the best chance of doing it as discreetly as possible.
So, if you have decided to give it a go, understanding that it won’t seamless, but are willing to accept the compromise, this guide explains the best approach for minimising visibility of patch repairs:
Prep & Sand the Surface
Repair the microcement surface & sand well to ensure there are no ridges between the 2 surface, the flatter, you can get the surface, the less likely you are to see the patch.
Use Primer 100 over large surfaces, but keep it within the patch area, as un-coated primer will remain tacky & attract dirt.
Trowel & Sponge the Microcement
Trowel over the patch, going slightly over the edges on all sides. Try to keep the edges of the patch random, to encourage it to blend more with it’s surroundings.
Then, with a sponge, dab the edges, so that the patch becomes feathered into the surrounding area. Again, keep the edges random, to reduce the appearance of the outline around the patch.
Keep Sanding to a Minimum
Try to get the patch flat with the trowel & sponge. Sanding can highlight the patch more, so you want to keep it to a minimum. If you need to sand the patch, then do so gently, by hand only.
Reseal The Surface
Once the microcement is fully dry, you will need to reseal the surface.
This guide explains how to reseal microcement surfaces:
Ideally, seal the entire surface that the patch repair was on, to ensure a seamless appearance. If you want to try feathering the sealer instead, gently coat over the patch, then reduce pressure on the roller as you get outside on the patch, this will help to reduce visibility of the join between the new sealer and the original coat.
What if I Don’t Have Enough Products Left?
We sell all the products individually, so you only have to buy the items that you need to finish the job. Please feel free to get in touch if you would like us to help work out quantities.
Leave to Dry
Leave for at least 48 hours. Light use only for the first 14 days. For more information on caring for your microcement surface, visit the guide below: