Repairs to Microcement Surfaces
Microcement is notoriously difficult to patch, and almost impossible to do seamlessly. So, it’s important to complete first fix plumbing & electrical work before applying the microcement. This will help to avoid the need for repair work.
Of course, accidents do happen & occasionally you might need to complete larger repairs to the microcement surface. Here’s our guide to repairing damages in this instance.
Fill Voids & Prepare the Area
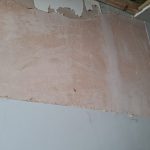
Microcement will need a solid surface to adhere to, so before you begin the repair, fill any voids so that the surfaces are completely flat & stable. If you have replaced sections of plaster board or cement board, it will need flushing out with a suitable filler so that the surface is completely flat.
Remove any loose material and make sure the area that you are going to repair is clean, dry and free from dust and debris. You can tidy up rough edges by gently sanding them (try a 120 or 220 grit).
Prime & Mesh
Use Primer 100 over the area to be repaired. If there are joins in the surface, then use Fibreglass Mesh to bridge the joins & add strength to the surface.
Level the Surface with Microcement Base Coat
Level the surface with microcement base until the void is the same depth as the rest of the microcement surface. Apply the base coat in several thin coats rather than one thick coat. You may need to complete 2-3 coats of microcement to achieve the correct level.
Re-Apply Top Coats Across the Entire Surface
To get a seamless surface, you will need to reapply the top coats across an entire surface up to the external edges of that surface e.g. a wall up to the internal corners of that wall. Take care not to allow excess products to build up in the corners & you should find that it blends well with the surrounding surfaces.
Prime & Recoat
First, give sealed surfaces a sand to give them a key.
Once the area is clean and dry, apply a coat of Primer 100, followed by 2 additional top coats and then sealers.
You’ll probably notice that the first coat of microcement appears grainy and may drag, this is why we recommend a second top coat, which should go on a lot more smoothly.
Product Installation Guides
See the relevant product installation guides for full application instructions for each product.
What if I Don’t Have Enough Products Left?
We sell all the products individually, so you only have to buy the items that you need to finish the job. Please feel free to get in touch if you would like us to help work out quantities.
Leave to Dry
Leave for at least 48 hours. Light use only for the first 14 days.
IMPORTANT: Like all cementitious products, microcement takes 28 days to full harden. It’s at it’s softest for the first 14 days after laying. During this time it should only be subjected to light use and light foot traffic.
Any heavy work is not recommended, but if it does take place then we recommend that you cover the floor with a breathable material or only cover down whilst working & lift the protection off for the majority of the time. The surface needs to dry out and harden. If airflow is restricted, it will stain & not cure correctly.