
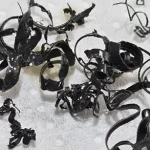
Black Plastic Shavings in the Microcement Mortar
Black plastic shavings in the mix are normally caused when the microcement is mixed too agressively in the black cemher tubs that the microcement is delivered in.
Here are some tips that will help you to avoid mixing too aggressively & explain how to recover your mortar.
Take care not to mix the microcement too aggressively in the black Cemher tubs that it is delivered in. As the mixer head can catch on the sides of the tubs and scrape small shavings of black plastic from the sides of the tub.
Here are some tips that will help you to avoid mixing too aggressively & what to do if you already have.
Control the RPM
Keep your mixing drill at a low-to-medium speed. High RPMs cause the drill to jump and chatter violently against the bucket walls, this can cause damage to the bucket and inevitably add plastic shavings into the mix.
Hover in the Centre
Keep the mixer head hovering steadily in the middle of the bucket and avoid contacting the bucket walls.
Scrape Manually
To pull unmixed Microcement from the sides, stop the drill completely. Using bucket trowel to remove any loosed product from around the sides of the tub by hand rather than with the mixerhead.
Removing Plastic Shavings from the Microcement
If you have already mixed the tub & have noticed there are small black plastic shavings in the mix, then there are 2 ways that you can save the mix:
Option 1: Sieve the Microcement
You can use a piece of fibreglass mesh to sieve the microcement into a clean bucket. The mesh should catch any imperfections in the mix leaving you with a smooth mortar.
Options 2: Remove from Surface
If there are just a few black shavings in the mix, you may find it easier to trowel the product directly onto the surface & remove the plastic shavings with the corner of your trowel as you go. Once removed, you can smooth the microcement back over before it sets hard.