
Applying Silicone to the Join between Microcement & Shower Wastes
It’s essential that all open edges are silicone to prevent water getting behind the microcement and causing any problems. This is especially important around shower wastes which are constantly exposed to direct water.
This guide explains the process for applying silicone to the join between microcement & the shower waste.
Applying Silicone to the Join between Microcement & Shower Wastes
The microcement that we recommend for bathrooms is completely waterproof on the surface, but if water gets behind the surface it may damage the substrate & cause problems for the microcement.
That’s why it’s essential that all external edges including shower wastes are completely sealed, so that no water can get through any gaps between the 2 surfaces.
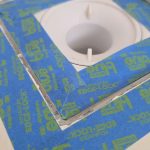
Tape Around the Shower Waste
Carefully tape both sides of the join between the shower waste and the microcement. The join doesn’t need to be very wide, but do make sure that the whole join is within the taped lines.
Silicone the Join & Smooth
Fully surround the perimeter of the with silicone & flatten it into the join.
Choose a product with 100% silicone content, to make sure it will adhere to the microcement.
Smooth out the silicone so that it is flat against the surface and completely fills the area between the 2 taped lines. Then carefully remove the tape. Smooth the silicone again, before leaving it to dry.
Pro Tip: Use a coloured silicone that matches the microcement for a more discreet seal. Mapei offer a good selection of 100% silicones that are available in a wide range of colours under the brand name Mapesil AC.