
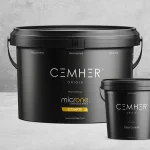
Applying Microne Coarse with Glass Crystals
Follow the directions below to apply the Microne Coarse with Glass Crystals.
The standard consumption for Microne Coarse with Crystals is 20kg for 10m2, one coat. Expected drying time for Microne Coarse is 12 hour and there is no limit on how long you can leave it between coats. Microne has an unlimited pot life so you can take your time working with it.
For best results apply a final grout coat of Microne Medium to finish.
You will need a microcement mixer and a flexible trowel.
Mixing the 1st Coat Microne Coarse with Glass Crystals
You will need 20kg of Microne Coarse with Crystals to complete 1 coat over 10m2.
Mix the Microne thoroughly to ensure an even distribution of colour.
Then add 3kg Glass Crystals to 10kg Microne Coarse & mix gently on a slow speed. Take care not to mix too aggressively as this could cause the Crystals to break down.
Applying Microne Coarse with Crystals
Use a Microcement Trowel and hold it quite flat to the surface. Don’t put as much pressure on as you did with the base coats to avoid the crystals leaving drag marks across the surface.
Float the Surface
Leave it to dry for around 30 minutes, then use a hard sponge float to remove imperfections & bring the crystals to the surface. Work across the area in circular motions, without too much pressure.
You’ll notice that the appearance of the surfaces changes as you float it. Ideally, the whole area should look the same once floated.
Gently spread the crystals across the area so that you have full coverage and drag marks are minimised.
Leave to Dry
Leave the Microcement to dry. With crystals in the mix, this often takes more time than standard Microcement. Allow up to 12 hours. Drying times do vary depending on temperature and ventilation.
Sand with 40 Grit Silicone Carbide Sand Paper
Sand with 40 grit sand paper to reveal the crystals in the microcement. This will be a lot easier with an orbital sander than by hand.
Mixing 2nd Coat Microne Medium
You will need 5kg per 10m2 for your final Microne Medium.
Mix thoroughly to ensure the colour is well distributed.
Do not add glass crystals.
Let the mixture rest for a few minutes before applying.
Applying 2nd Coat Microne Medium
Use this coat to glide over the previous one, filling in any imperfections as you go. Because there’s no crystals in it, you go can a lot thinner with this coat.
Leave to Dry
The microcement needs to be fully dry before sealer is applied. If not the microcement will not reach full hardness and could de-laminate.
Moisture content should be less than 5% before sealer is applied.
The timings below are for guidance only, your microcement may take longer to dry depending on temperature and humidity.
Leave to dry for at least 12 hours.
Sand with 40, 80 & 120 Grit Silicone Carbide Sand Paper
Sand with 40 grit sand paper to reveal the crystals in the microcement.
Once you have revealed a good, even spread of crystals, move onto the 80 grit sand paper and give the whole area another sand.
Finally, use a 120 grit sand paper to tidy up your wark and close in the pours.
Vacuum the surface to remove all dust and debris. Do not wet the microcement.
We stock a range of Microcement Sanding Discs on our website.
Cemher Microne Coarse Sparkle Effect
| Process | Apply 1 Coat Microne Coarse with Glass Crystals, followed by a coat of Microne Medium without Crystals |
| Mix Ratio | 10kg Microne Coarse : 3kg Glass Crystals |
| Standard Consumption |
Microne Coarse: 10kg per 10m2 Microne Medium: 5kg per 10m2 |
| Estimated Drying Time |
Between Coats: Minimum 3 hours No Maximum Before Sealers: Minimum 24 hours No Maximum |
| Tools Required |
Microcement Trowel Microcement Mixer Silicone Carbide Sanding Discs Clean Mixing Bucket Weighing Scales Measuring Jug PPE |
| Safety & PPE |
Nitrile gloves Eye protection Respiratory mask/extraction when sanding Ensure adequate ventilation throughout |