
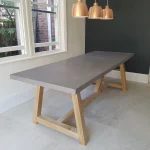
Applying Microcement on Table Edges
When Microcementing the vertical edge of a tabletop, the key is getting the material to wrap over the corner cleanly without leaving excess product on the edge to harden.
This guide explains how to correctly apply Microcement over table edges and corners.
Whilst applying each coat of microcement to the tabletop bring it right up to and slightly over the edge allowing the Microcement to overhang so some excess product runs over the edge of the table.
Clean your trowel, then use it on the vertical surface to flatten the excess product along the table edge.
Keep the trowel flat to the vertical rather than trying to work at an angle along the corner. Use downwards trowel movements to spread the microcement from the top corner of the edge to the bottom, taking any excess away from the edge as you go.
Whilst the microcement is still wet, you can gently run a cloth or your trowel along the corner to remove excess Microcement.
Use the same principle to ensure the underside & bottom corner of the table have a nice clean edge too.
Avoid Using Angle Beads
Because microcement needs a completely flat surface, it’s best not to use angle beads on corners. The microcement is very strong as well so there isn’t the same risk of it failing on the edges like plaster would.
View this guide is angle beads are already installed:
Using Angle Beads, Stop Beads and Expansion Beads with Microcement
Hand Sand the Finish
Once the microcement has dried, it’s better to sand the corner gently by hand, so that you have more control over how much product you remove. Use silicone carbide sanding discs in the grit that is recommended in the product installation guide.