
Fixing to Microcement Surfaces
Microcement is a thin surface coating that is applied to a rigid surface. Thankfully it’s flexible enough to avoid shattering when you drill or cut through it, so you just need to use tools that are suitable for the substrate.
You will also need to use silicone to prevent water getting behind the Microcement through any open edges.
Here’s a guide which explains the full process and appropriate timings.
Because Microcement is only a 3–4mm thick, it does not hold the weight of heavy fixtures on its own. The underlying substrate does all the heavy lifting.
Leave to Dry
Wait at least 48 hours after the final sealer coat has been applied before attempting to drill into the surface or install any fixtures. The material is at its softest during the first 14 days, so take care not to drag anything across the microcement or drop anything on it.
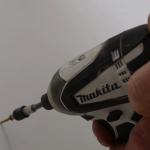
Use the Right Drill Bits/Screws
Always use drill bits & screws that are specifically suitable for the underlying substrate (e.g. masonry bits/screws for concrete, or wood bits/screws for timber stud work).
Pro Tip: Fix masking tape over the entry point to prevent the drill bit from slipping and scratching your polished finish. And don’t use the “hammer” setting on your drill until you are completely through the thin Microcement layer to avoid chipping the edges.
Seal with Silicone (Essential for Wet Areas)
The microcement that we recommend for bathrooms is completely waterproof on the surface, but if water gets behind the surface it may damage the substrate & cause the microcement to delaminate.
It’s essential that all external edges including cuts and holes made whilst fixing fittings to the surface are completely sealed, so that no water can get behind them.
Squeeze silicone directly into the raw screw hole before inserting your wall plug/screw. And fully surround the perimeter of any mounted fittings (like shower valves, taps, or brackets) with silicone.
Silicone sealants must be 100% silicone in order to adhere to the microcement.
Pro Tip: Use a coloured silicone that matches the microcement for a more discreet seal. Mapei offer a good selection of 100% silicones that are available in a wide range of colours under the brand name Mapesil AC.